CSV Files: Download Instructions
Downloading CSV Files from your Bank
For us to be able to do our clients accounts at a reasonable cost it is important that our clients are able to download CSV files from their bank accounts and email them to us.
A CSV file is a form of ‘spreadsheet’ file made up of rows and columns. CSV files are already digital and can be easily imported into any of the accounts packages that we use to do our clients bookkeeping and accounts.
Note that PDF files and statements ARE NOT a digital format and these have to be converted or transcribed manually. Not all PDF files can be converted into a digital format and manually transcribing them is a long and tedious process where every line has to be manually typed into a document.
This post has been written to provide details on how to download CSV files. Although the screenshots show details from an RBS account, the process is essentially the same for every bank.
Before you start please note the following:-
- Every bank has a facility to allow the downloading of CSV files. Sometimes these will be referred to as ‘Text’ or ‘Excel’ or ‘Lotus 123’ files.
- Most banking mobile Apps DO NOT allow you to download CSV files. Normally you can only get them by logging into your ‘Digital Banking’ on a computer.
- PDF Files and Statements ARE NOT a suitable alternative.
- Note that some banks (TSB and Lloyd’s) limit you to 3 months maximum range and you will need 4 or 5 downloads to cover a whole year.
CSV FILE DOWNLOAD INSTRUCTIONS
1. Log into your ‘Digital Banking’ on a computer. This will normally take you to a List of your bank accounts, if you have more than one.
2. In the Accounts List select the desired account. This will normally show you a summary of the account you have selected.
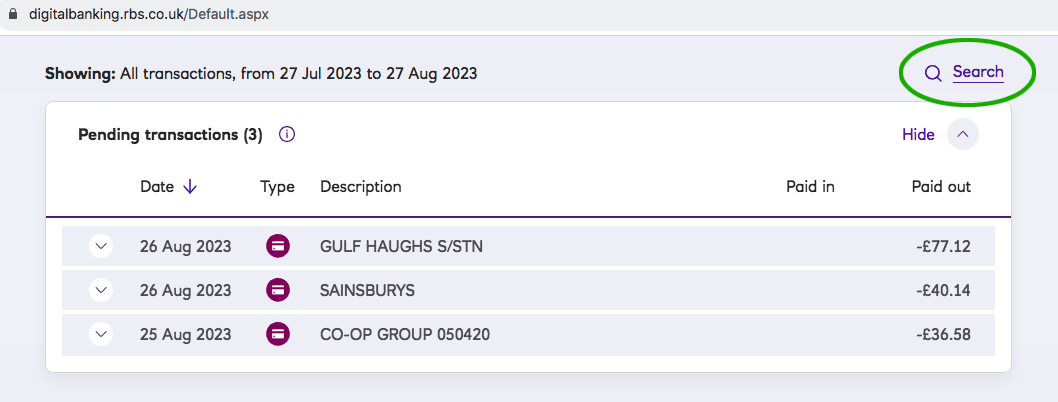
3. Within the Summary, click on ‘View Transactions” This will normally show you a list of your transactions with the most recent at the top. Somewhere in the window there will be a link or button that will allow you to ‘Search’ your transactions. (see below)
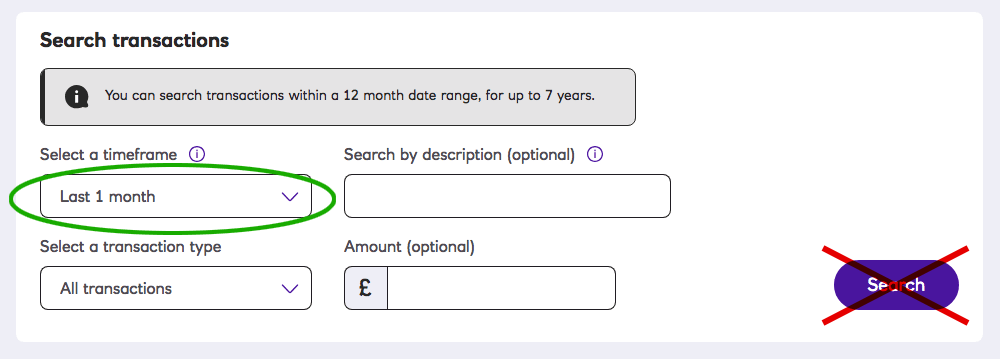
4. Click on the ‘Search’ link or button. This will bring up a dialog box inviting you to do a search. Note that you want to include everything between certain dates. In some cases a pop-up list may have preset periods like “1 Month”, “2 Months”, etc. BUT DO NOT SEARCH until you have to selected “Between Dates” or “Dates Range”. in the menu.
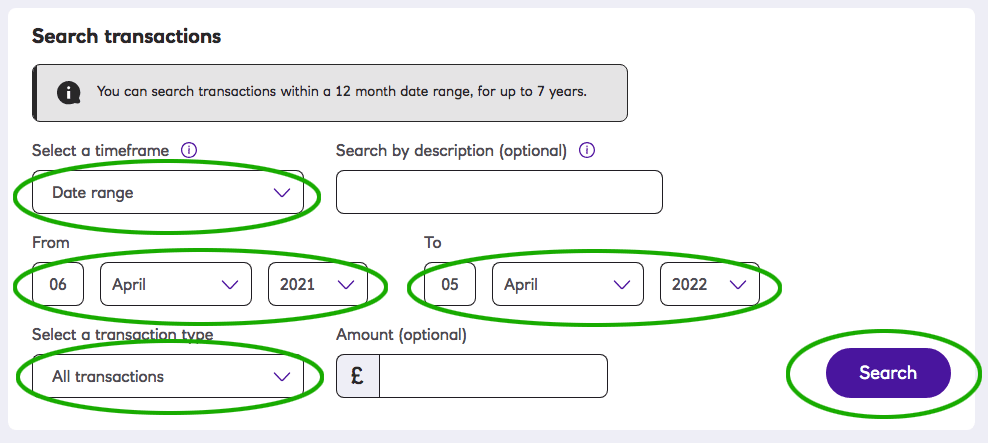
When you have the ‘Search Dates’ or ‘Dates Range’ function, input the range of dates that you want to be included. Make sure you include ‘All Transactions’. (see below)
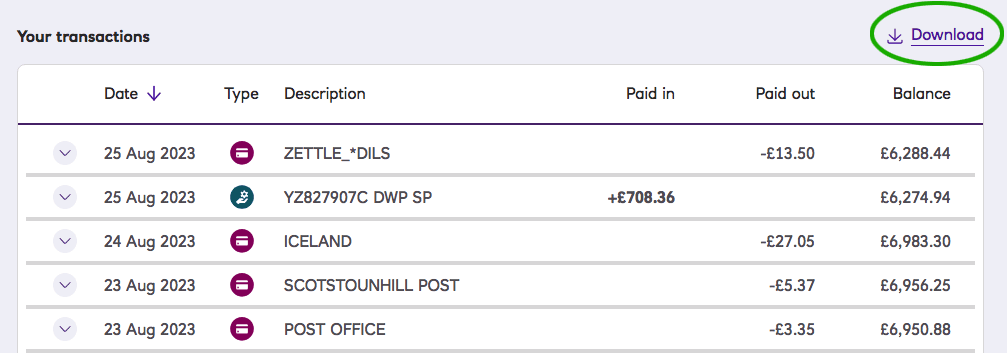
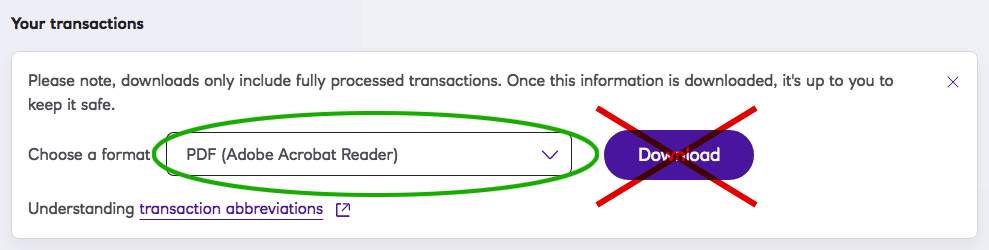
5. After clicking on ‘Search’ a Transactions List will be provided that includes ONLY the transactions within the specified dates. At the top right hand corner of the list, click on ‘Download’ to summon the ‘Download Dialog Box’. (see below)
6. In the Download Dialog Box that appears the default PDF is likely to be showing but DO NOT DOWNLOAD, click on the Popup Menu at ‘Choose a Format’ and scroll down to select ‘Excel & Text (CSV)’ instead (see below)
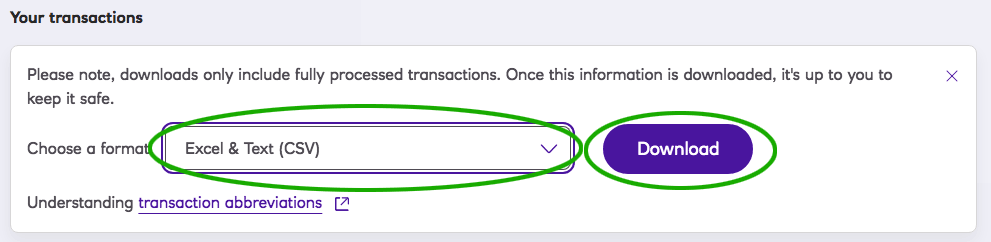
7. When ‘Excel & Text (CSV) is selected, click on ‘Download’. The file will be downloaded to your ‘Downloads’ folder. If you wish you can go to your ‘Downloads’ folder and move it onto your Desktop.
Note that in some web browsers, you may have the option to download to a different folder, AND there may also be an additional security step.
If you have trouble with downloading CSV files and you live locally, please arrange to visit us. We will help you download what you need and show you how to do do it for future occasions.